I’ve been dabbling with Tanzu Kubernetes Grid (TKG) for the last few weeks. Thanks in large part to William Lam’s TKG Demo Appliance.
For a recap on TKG, have a read of Chip’s great breakdown here. Chip’s summary is excellent, so i’ll copy it verbatim here:
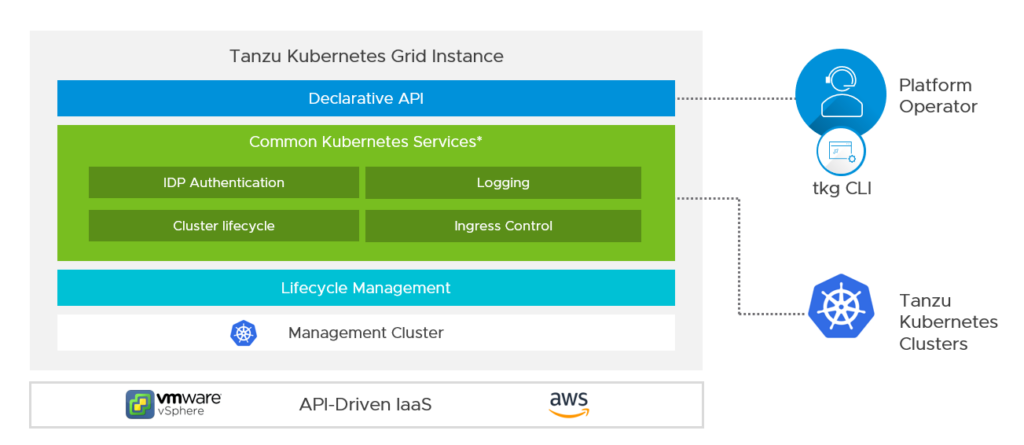
First, let’s step back and discuss the name and what it means. Tanzu is a portfolio of products; it’s not one single product. Referring to any product as “Tanzu” is therefore not accurate and only adds to the existing confusion. Tanzu Kubernetes is the name referring to VMware’s common “distribution” of Kubernetes across all its products that are capable of deploying a Kubernetes cluster (this is the “Run” category within Tanzu). It is a collection of pieces which has the upstream Kubernetes binaries at its core and is specifically designed to integrate with and run best on VMware’s platforms.
A Tanzu Kubernetes cluster is what you get when you deploy a cluster using vSphere 7 with Kubernetes (specifically the “guest” cluster running as VMs) or Tanzu Mission Control. However, with the Tanzu Kubernetes Grid offering, you get that same flavor of Kubernetes in a standalone form factor delivered through a single CLI tool along with production support. Given the collection of pieces, TKG also gives you the freedom and flexibility to run in the core, in the public cloud, or at the edge. While all these offerings provision Tanzu Kubernetes clusters, TKG is designed for more of a DIY experience where you already have Kubernetes experience in-house and want more hands-on and control. If you want that control but also want access to professional guidance, there is a TKG+ (TKG Plus) offering that additionally gives you access to VMware’s Customer Reliability Engineering (CRE) group. Regardless of whether it’s TKG or TKG+, neither is a replacement for the other offerings, but merely one possible option for the right customer base.
What comes as part of TKG 1.1? Well according to the release notes, quite a bit. With native Kubernetes, you’d be DIYing a lot of this yourself, and without enterprise 24×7 support.
calico_all: v3.11.2+vmware.1cloud_provider_vsphere: v1.1.0+vmware.2cluster_api: v0.3.5+vmware.1cluster_api_aws: v0.5.3+vmware.1cluster_api_vsphere: v0.6.4+vmware.1cni_plugins: v0.8.5+vmware.1containerd: v1.3.4+vmware.contour: v1.2.1+vmware.1coredns: v1.6.7+vmware.1crash-diagnostics: v0.2.2+vmware.2cri_tools: v1.17.0+vmware.1csi_attacher: v1.1.1+vmware.7csi_livenessprobe: v1.1.0+vmware.7csi_node_driver_registrar: v1.1.0+vmware.7csi_provisioner: v1.4.0+vmware.2dex: v2.22.0+vmware.1envoy: v1.13.1+vmware.1etcd: v3.4.3+vmware.5fluent-bit: v1.3.8+vmware.1gangway: v3.2.0+vmware.1haproxy_ova: v1.2.4+vmware.1jetstack_cert-manager: v0.11.0+vmware.1kube_rbac_proxy: v0.4.1+vmware.2kubernetes: v1.18.2+vmware.1kubernetes-sigs_kind: v0.7.0-1.18.2+vmware.1node_ova: v1.18.2+vmware.1tanzu_tkg-cli: v1.1.0+vmware.1tkg_extension_manifest: v1.1.0+vmware.1vsphere_csi_driver: v1.0.2+vmware.1
I decided to try it out without the help of the Appliance. With the release of TKG 1.1, the CLI is now available on Windows. Here is my attempt at deploying TKG to vSphere from a Windows client.
Pre-requisites
- A Windows 10 host to run the CLI from
- Docker installed
- Kubectl > v1.17.0 installed
- vSphere 6.7u3 with Enterprise Plus license
- You can use vSphere 7.0, but you must have vSphere with Kubernetes feature licensed and enabled. It’s possible to install without this, but is unsupported
- A standalone ESXi host, or a cluster with two or more hosts
- A TKG VM folder
- A “TKG” port group
- A datastore with sufficient capacity
- A network with DHCP to host the VMs
- NTP running and configured on all hosts, with consistent times and timezones
Deployment
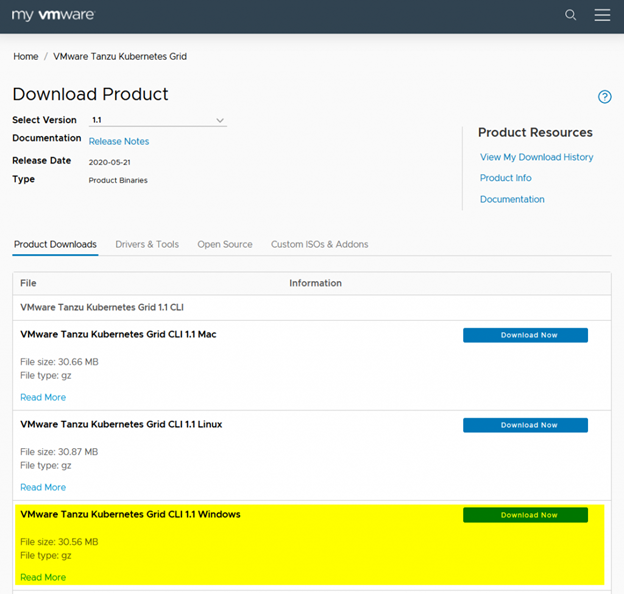
- Head on over to my.vmware.com and and download the TKG CLI 1.1 for Windows. Extract the gz using something like 7zip.
- While you’re there, download
Photon v3 Kubernetes 1.18.2 OVAandPhoton v3 capv haproxy v1.2.4 OVA. We’ll use these later.
- Create the folder
Program Files\tkgand drop the binary you just downloaded there. Rename it totkg.exe - Hit the Windows Key + R, enter
powershell -command "&{start-process rundll32.exe sysdm.cpl,EditEnvironmentVariables -verb RunAs}to edit the environmental variables as an Administrator - Select Path under System Variables, and click edit
- Click new, then enter
C:\Program Files\tkgand save - Fire up terminal and run
tkg version. Hopefully you see something like this
Client:
Version: v1.1.0
Git commit: 1faa437638dc81ed234721b2dbc2ad51ca9ec928- With TKG CLI up and running, we need to do a few things to get the vSphere environment ready.
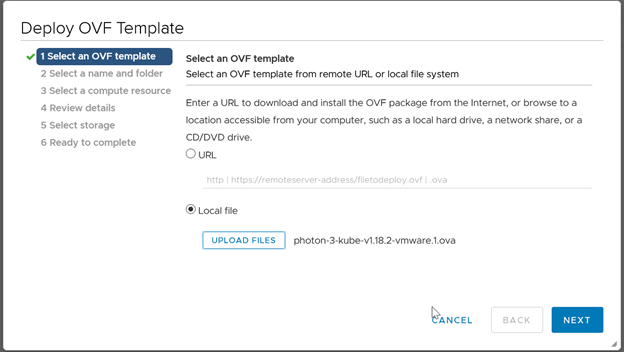
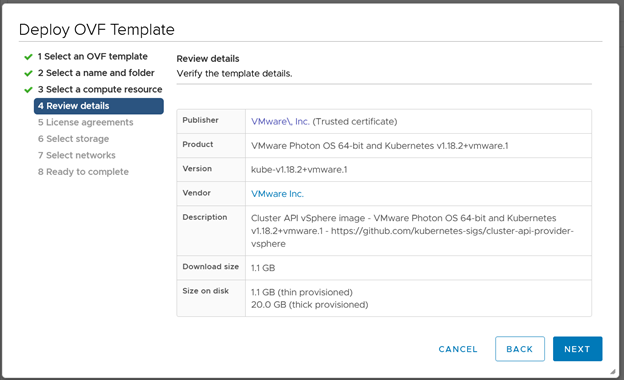
- Import the two OVAs as VMs. We won’t actually use these VMs, so the names don’t matter at this stage. Leave everything at the defaults.
- Once both OVAs have been imported, right click the VM > Template > Convert to Template. Do this for both VMs.
- Now you can head back to the Terminal window and run
tkg init –ui - I ran into an issue here. I had Docker for Windows installed, which includes kubectl, but only comes with v1.16.6, rather than the v1.17.0 required.
PS C:\Users\laute> tkg init --ui
Logs of the command execution can also be found at: C:\Users\laute\AppData\Local\Temp\tkg-20200617T104047400610863.log
Validating the pre-requisites…
Error: : kubectl prerequisites validation failed: kubectl client version v1.16.6-beta.0 is less than minimum supported kubectl client version 1.17.0-beta.0- I followed the instructions to install kubectl on Windows from https://v1-17.docs.kubernetes.io/docs/tasks/tools/install-kubectl/
- After downloading kubectl.exe v1.17.4, I copied this over the old version in C:\Program Files\Docker\Docker\resources\bin
- I then re-ran
tkg init –ui, success! - A browser Window to http://127.0.0.1:8080/#/ui appears
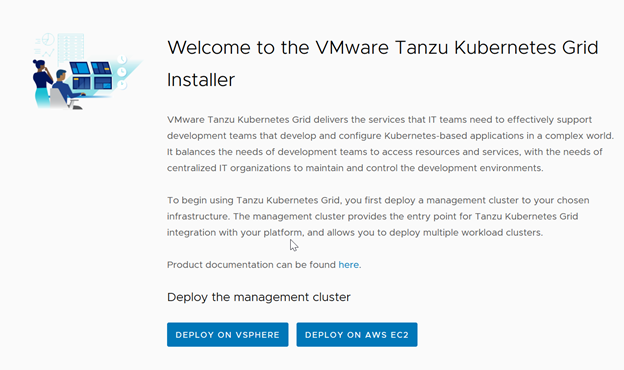
- Select Deploy on vSphere
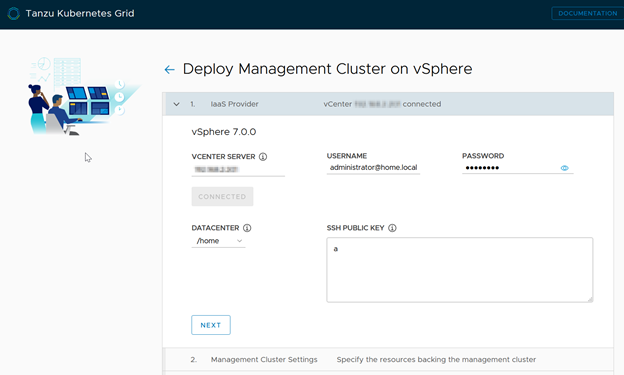
- Enter your vSphere details and credentials
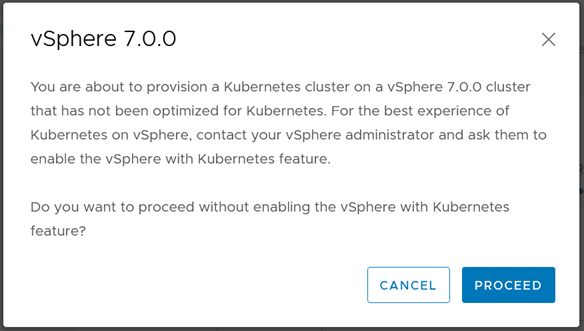
- You will see this warning if you are using vSphere 7 without the full vSphere with Kubernetes install. This is fine for a test install.
- Select the appropriate datacenter, enter anything you want for the SSH key, select Next
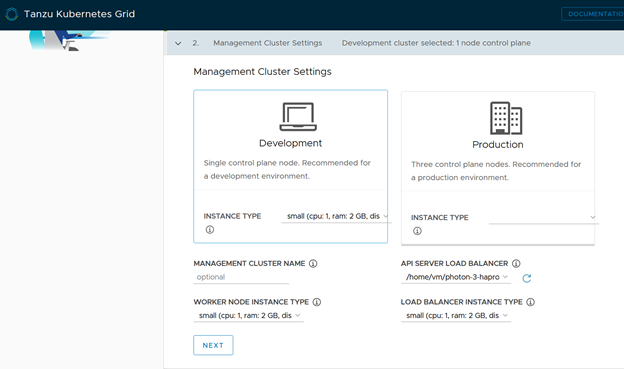
- Select “Development”, click the dropdown under
API SERVER LOAD BALANCERand select your Template that you uploaded earlier, then select the size of the VMs to deploy. Small is fine for development.
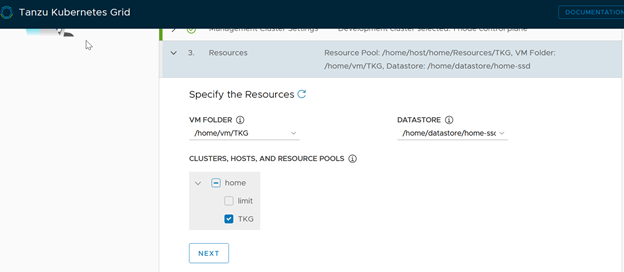
- Select the VM folder, datastore and resource pool to provision to
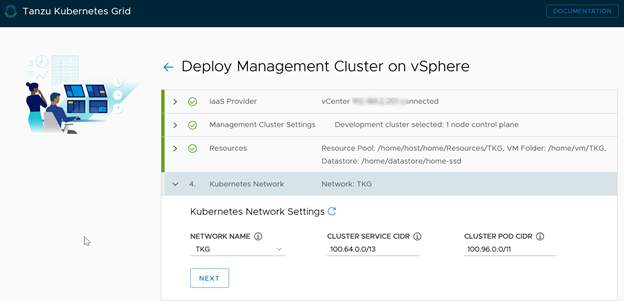
- Select the “TKG” port group under network name
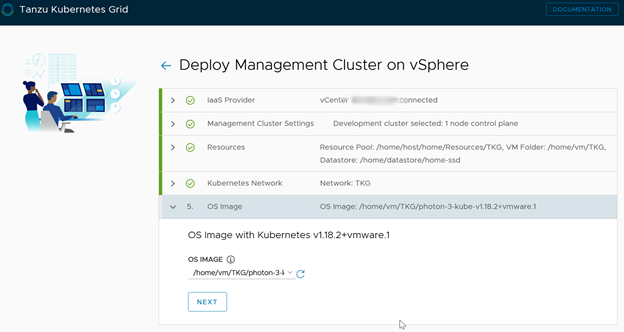
- Select the OS image as the other template that you uploaded earlier
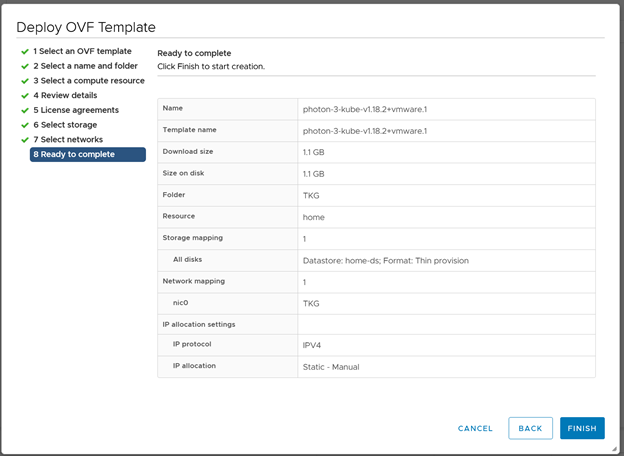
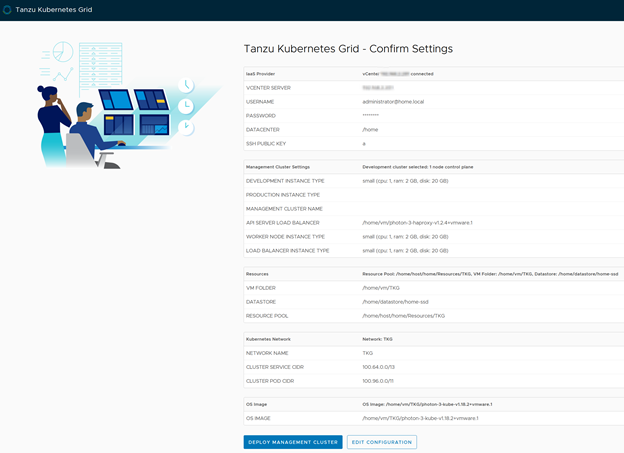
- Review all your inputs, then click Deploy Management Cluster
- You’ll start to see the logs populated straight away, and soon enough your vSphere environment will start cloning the templates to VMs.
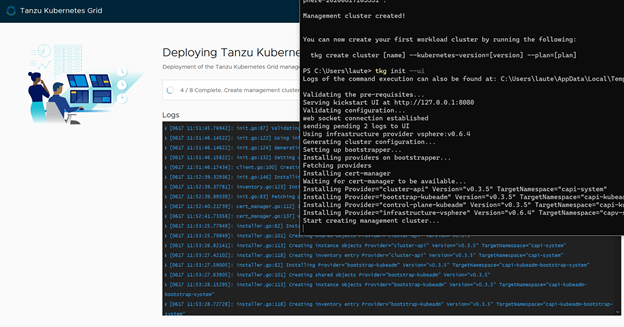
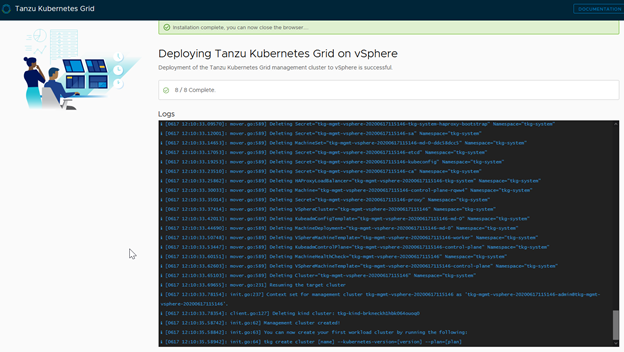
- Confirm successful management cluster deployment with tkg get management-cluster

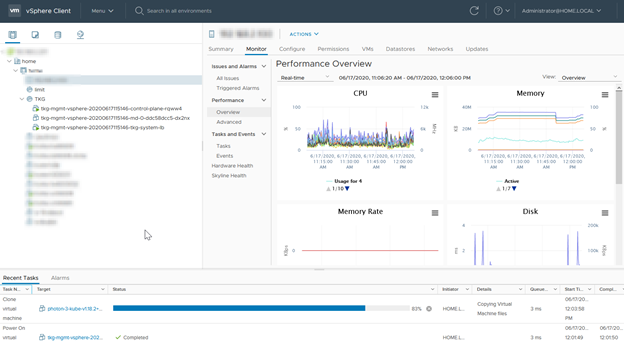
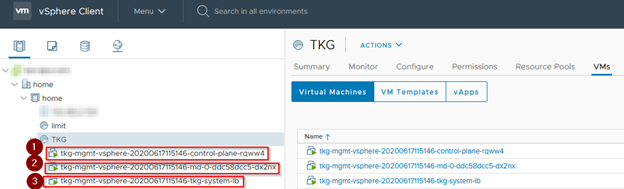
Success! You should also see the following objects in your vSphere client
- A control plane VM
- A worker node VM
- A load balancer VM
The next post will be about creating TKG K8s clusters for workloads.